Rinnai tankless water heaters have earned a reputation for their efficiency and reliability. However, like any household appliance, they can occasionally encounter issues. One of the common problems that users may need help with is Rinnai Error Code 10. This code indicates an obstruction or restriction in the air supply or exhaust system, potentially disrupting the regular operation of your heater. In this blog post, we will discuss the various causes of Error Code 10 and provide step-by-step troubleshooting tips to help you get your Rinnai tankless water heater back on track.
Understanding Rinnai Error Code 10
Error Code 10 is like a signal that tells you there’s a problem with your Rinnai tankless water heater’s air supply or exhaust system. This code can appear on different Rinnai tankless water heater models, including the Sensei series like RUR and RU models.
Common Causes of Rinnai Error Code 10
1. Venting System Issues:
Obstructions and incorrect venting system installation can trigger Error Code 10.
2. Contaminants in Venting System:
Contaminants inside the venting system can disrupt airflow, causing the code to appear.
3. Defective Sensor and Dip Switch Misalignment:
This error can happen when there’s something wrong with the air pressure sensor or the dip switch settings are not right.
4. Fan Blower Problems:
Blockages or malfunctions in the fan blower can cause Code 10.
5. Condensate Trap Blockage:
If the condensate trap is blocked, it can cause this error to pop up.
6. Incorrect Gas Pressure and High-Altitude Settings:
Having the wrong gas pressure or settings for high altitudes can mess up how the heater recognizes temperature.
7. PC Board Issues:
Problems with the PC board may also be a culprit.
Initial Troubleshooting Steps
Before diving into more in-depth troubleshooting, try the following simple steps:
1. Restart the Unit:
Turn the Rinnai water heater ON and OFF to see if it resolves the issue. Sometimes, a reset can work wonders.
Venting Problems
Venting system issues are a common source of Error Code 10. Follow these steps to address them:
1. Use Rinnai-Approved Venting Materials:
Ensure you use only Rinnai-approved venting materials and components.
2. Inspect the Venting System:
Remove the exhaust pipe from the top of the water heater and turn it ON. If the problem persists, it may not be related to the venting system.
3. Check Connections and Clear Obstructions:
Remove the connections, look for any damage, and clean away dirt and debris. Make sure to follow the manufacturer’s instructions when installing it correctly.
Condensate Drainage
Here’s how to fix problems with condensation:
1. Check the Condensate Trap:
Ensure the condensate trap is not complete or clogged. Verify proper installation and snugness.
Fan Blower Inspection
To inspect the electric blower for proper operation:
1. Turn OFF Power:
Before proceeding, turn off the power to the water heater.
2. Inspect the Fan Components:
Check the fan housing, wheel, motor, wiring, and anything that could stop the fan from working correctly.
3. Clean the Fan Assembly:
Remove contaminants from the fan assembly.
Air Filter Maintenance
This step applies to indoor models only:
1. Clean the Air Filter:
Locate the internal air filter (usually in the upper right-hand corner) behind the front panel. Clean it regularly to prevent blockages.
Burner Assembly Cleaning
Clean the heat exchanger and gas burner assembly to ensure unrestricted airflow:
1. Follow Manufacturer Instructions:
Take out and clean the parts like the heat exchanger, copper fins, gas burner, and orifice, following the instructions from the manufacturer.
DIP Switch Configuration
Ensure proper DIP switch settings:
1. High-Altitude Settings:
Adjust the DIP switch to the correct position for your location, especially in high-altitude areas.
Gas Pressure Adjustment
Correct gas pressure settings are crucial:
1. Set Gas Pressure:
Adjust low and high fire gas pressures as specified by the manufacturer.
Safety Precautions
Safety should be your top concern. Hiring a licensed technician is smart if you need help with tricky fixes. And if you’re trying to do it yourself, remember to turn off the gas, water, and electricity to stay safe.
How to Display Diagnostic Codes
To access and interpret diagnostic codes:
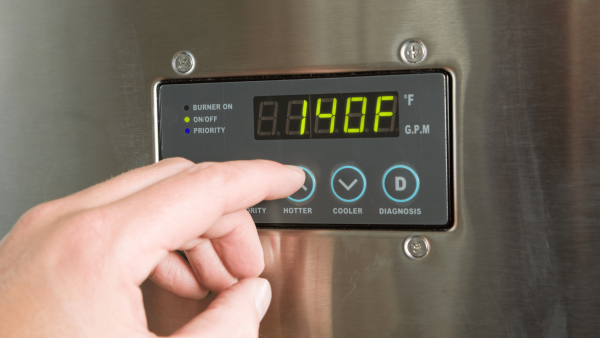
1. Access Diagnostic Codes: Turn OFF the tankless water heater, press and hold the ON/OFF button for a few seconds, and then press the UP button simultaneously.
2. Interpret Codes: The last nine codes will be displayed.
3. Exit Menu: To return to the previous menu, simultaneously hold the ON/OFF and UP buttons.
4. Turn ON Power: Finally, turn the power ON by pressing the ON/OFF button again.
Conclusion
In conclusion, encountering Rinnai Error Code 10 can be frustrating, but you can resolve many causes with the proper knowledge and troubleshooting steps. This blog post has equipped you with valuable information to diagnose and address the issue effectively. However, when facing more complex problems or uncertain about the repairs, it’s advisable to consult a licensed technician. Your safety and the reliability of your Rinnai tankless water heater should always be the top priority when dealing with advanced technology like Rinnai heaters. Troubleshoot wisely and enjoy an uninterrupted hot water supply once again.


